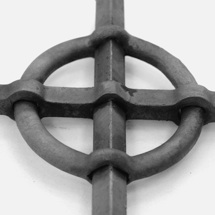
Thanks so much to everyone who came out for the fun! We had a wonderful day:
Sunday, October 17, 2010
Tuesday, October 12, 2010
Claude Moore Market Fair -- I am Blacksmithing this Weekend
Hello everyone,
If you've seen the kids recently, they are probably talking to you about Daddy blacksmithing at Market Fair this weekend. They are correct – I am getting ready, as we all are, to don colonial attire once again for Claude Moore's Market Fair this weekend, where I put my blacksmithing hobby and teaching gifts on display. The boys and my wife will be at the toys' stand, although our son has plenty of plans to make candles and potpourri, paint watercolors and do lots of the other kids' activities. J
If you are interested, we'll be there both days and attached is the official flyer. If you go to the website, there are discounted tickets available. http://1771.org/market_fair_pass.htm
And, if you can't make it but would still like to see what Jeff's blacksmithing is all about, please don't hesitate to call us or email -- we'd love to fill you in.
Hope to see you there!
Monday, October 11, 2010
Monday, October 4, 2010
A Custom Light Cover
I made this light cover last year for St. Aidan's church to solve a problem they had with kids kicking over the light when they were playing. I made it with 1/2" square bar and twisted and punched the corners before wrapping the ends around. I think it turned out pretty nice.
Tuesday, September 21, 2010
Candleholder in Action
Our friend Michael Rininger sent this photo of my candle holder at their Hume Day booth. You can see more about their bees and honey at http://fernhillapiary.blogspot.com/.
Thursday, September 16, 2010
Anvil Floor Repair
I have been working in my forge for over a year now, so I've had enough time to see what works and what doesn't. Most things work wonderfully, but I've had a bit of difficulty with the floor of the shed shaking when I use the anvil. The floor was the wood floor that came with the shed and it was simply placed on a bed of gravel.
Our friend, Steve was a huge help in building the base for the anvil (among lots of other things!) and he teased me about the problem-- "You mean, we went to all that trouble to build a solid stand and you put it on plywood?" He had a point.
So, the boys and I and our good friend Brad went to work. We cut out a section of the floor where the anvil rests and poured a new cement floor.
The kids had a great time trying out various methods for mixing cement (they liked rolling the cement, but Jeff preferred the wheel barrow-mixing method) and got to put their footprints on the new floor.
I haven't had a chance to do much smithing on the new base yet, but we think it'll work great!
Wednesday, September 15, 2010
Claude Moore Colonial Farm Autumn Market Fair!
Hello Market Fair visitors--
The Autumn Market Fair is only 1 month away! I've attached a flyer you
can print and post or hand out. And don't forget you can download
50%-off passes from our website: http://www.1771.org/market_fair_pass.htm
Make sure you put the dates of the Fair on your calendar: Saturday &
Sunday, October 16 & 17.
The Autumn Market Fair is only 1 month away! I've attached a flyer you
can print and post or hand out. And don't forget you can download
50%-off passes from our website: http://www.1771.org/market_fair_pass.htm
Make sure you put the dates of the Fair on your calendar: Saturday &
Sunday, October 16 & 17.
Tuesday, August 31, 2010
Beeswax Candles
These are a couple photos of our friend Michael and Donielle Rininger's candles (http://fernhillapiary.blogspot.com/) today in my candlestick.
Sunday, August 22, 2010
Woodworking at Kanuga
We just returned from a week at Kanuga, an Episcopal retreat center that offers what is basically an old-fashioned family camp with lots of crafts and I discovered a love for wood carving & basket making and met lots and lots of wonderful people. We look forward to returning next year!
Sunday, July 18, 2010
Tuesday, July 6, 2010
Forge Welding
I was making some crosses last evening in preparation for Market Fair. You can see some shots of these crosses in one of my recent posts here: http://blackforestironworks.blogspot.com/2010/06/beautiful-rustic-cross.html.
These crosses require some welding. There are various techniques for welding (i.e. forge, MIG, Oxy-Acetylene), and I have taken a few classes in the various methods.
This is my Chile Forge "Tabasco" at full burn (~20 psi) ready to weld:
Last night, I forge-welded, which involves scarfing the two ends to be joined (tapering them to thin, flat ends which overlap), heating the metal to immediately below its melting point and using a powder called flux (borax) to impede oxidation and increase the chance that the weld will stick. Once the two ends get to "white-hot" in the forge, the piece comes quickly out of the forge and is hammered together to make the weld.
Monday, July 5, 2010
Reviewing the Day's Work
After an evening in the forge, I often bring my work in to study it and to share it with the family; I often "tweak" it the following day to get it just how I want it.

You can see it was pretty hot out there. The temp went over 90 during the day this day, and most of this week. Even at almost 9PM, it had to be close to 100 degrees out there!
I noticed this one had a slight bend in the tail that made it sit funny and the cup was also tilted, neither of which I could let slide, so I fixed both the next day.
Saturday, July 3, 2010
In the Forge: Scroll Candlestick Holders
Market Fair is July 17th and 18th, and I am getting ready. Today, I was making some scroll candlestick holders:
Friday, July 2, 2010
Tasks
Make MF Inventory - 3 candlestick holders, 3 letter openers, 3 crosses, leaves
Finish ring
Make trivet
Make Tongs
Buy Drill Press
Buy Drill Press
Buy Sander
Make anvil Swage box (from Mark's book)
Make vise stand (from Mark's book)
Scott Forge (Illinois) family tour
Make vise stand (from Mark's book)
Scott Forge (Illinois) family tour
Claude Moore Colonial Farm Market Fair Brochure
Hello Market Fair visitors --
This is shaping up to be a great Fair. Below is a PDF that you can print and post to get the word out about the July Market Fair. Put it up at work, in your neighborhood, anywhere you can think of!
Hope to see you there!
Please see more details at Claude Moore Colonial Farm website at: http://www.1771.org/
Friday, June 25, 2010
Mark Aspery Class: Pass-through Ring
I took an amazing class June 13-19 at Touchstone Center for Crafts in Farmington, Pennsylvania taught by Mark Aspery and his more-than-able assistant, Gerald Boggs. I took a week of vacation and really expanded my craft during my time there. The place was great, with very nice dorms and lots of other artists there to talk and eat meals with and a campfire every night to sit around and talk to other artists. It was very cool.
The class was based around making a pass-through ring to learn about all aspects of joinery. The idea for the class was an inspiration Mark had when he viewed a similar ring in one of Fritz Kuhn's books from the 1920's and was motivated to understand how this was done. He spent the next several months reverse engineering the ring and how to make it as part of the research for his third book, coming in a year or so, that will focus on joinery techniques for the blacksmith.
The ring itself starts with a 1/2 straight bar that forms the ring. There are some relatively complicated mathematics (for me, anyway!) to measure the stretch of the metal and the holes in it as it bends into a ring, so much of the lecture time was focused on this. It was a great growth experience to immerse myself in the details of how something like this is made and the reasons things are done certain ways. The complexity and accuracy inherent in a piece like this required an intense focus and precision to get it right and that also was a good learning opportunity for me. For example, all the holes are punched before assembly and they cannot be off more than 1/16 or the piece will not fit together.
Mark's version (pictured on his website at http://www.markaspery.net/) of the pass-through ring:
In the class, we spent the first 3 days making all the necessary tools to make this pass-through ring.
- 1/2" drift
- 9/16" drift
- 9/16" slot punch (tempered)
- 3/4" square drift
- 3/4" slot punch (tempered)
- Fulstum cone
- Hardy base for the cone
- Chainmaker's swage
- 1/2" round hardy bottom tool
For the piece itself, there are two square holes punched in the round bar before it is bent in several stages into a semi-circle (later into the full circle). The square vertical bar comes next and two round holes are punched in it that will eventually allow the ring to pass through those.
There is an interesting lesson in that square piece alone because metal expands when it is hot like most things, so it will essentially be larger when the holes are punched and then shrink as it cools. This has to be taken into consideration when punching the holes, so it is not only the alignment of the holes (where they are on the bar) that must be measured, but also the size of the final hole when it is cool. Essentially the hole has to be slightly larger than the bar passing through it when it is cool (Mark calls is 1/2+) and then punched slightly larger than that (1/2++) to allow for the cooling because it is punched hot. This concept has some interesting implications on your tooling as well, since the tool itself has to be correctly (and accurately) made to one of these three sizes so the hole ends up correct at the end.
Which size should the tool be, you ask? Well, it can't be 1/2" because that is the same size as the bar passing through it and it can't be 1/2+ because the hole must be that size when it is cool (finished) so the ring can safely pass through it. Since the piece will be hot when punched, the tool must be made to punch 1/2++ so the hole can cool (shrink) back to the proper size. We made our punch and drift to make the holes 9/16" and that allows enough space for the ring to pass through even after the shrinking.
So, the class was incredible because we learned and practiced an amazing variety of skills and disciplines just to get to the point where we could consider making the piece. I consider the event a major growth period in my progression as a blacksmith and I am glad I had the opportunity to participate.
Wednesday, June 23, 2010
Subscribe to:
Posts (Atom)