Sunday, June 13, 2010

A Beautiful, Rustic Cross

I have been working on a cross for a friend who will give it to his father for Father's Day.   To make the ring, I got to try out his own forge welding system in my home forge for the first time.  It worked, but not without some collateral damage.  Unfortunately, I burnt out the bottom part of the forge because I forgot to put the side and bottom armor in (extra floor and sides for exactly this purpose), but it was definitely a learning experience.  Yesterday, I put the finishing touches on the cross:


Here's the finished product.

Front:


Back:


My wife says she'd really like one of these.  The whole family knows this one belonged to Mr. R.  In fact, the boys would talk about how "daddy needed to go work on Mr. R's cross".  Her turn will come one of these days!  

Monday, May 31, 2010

Leaves

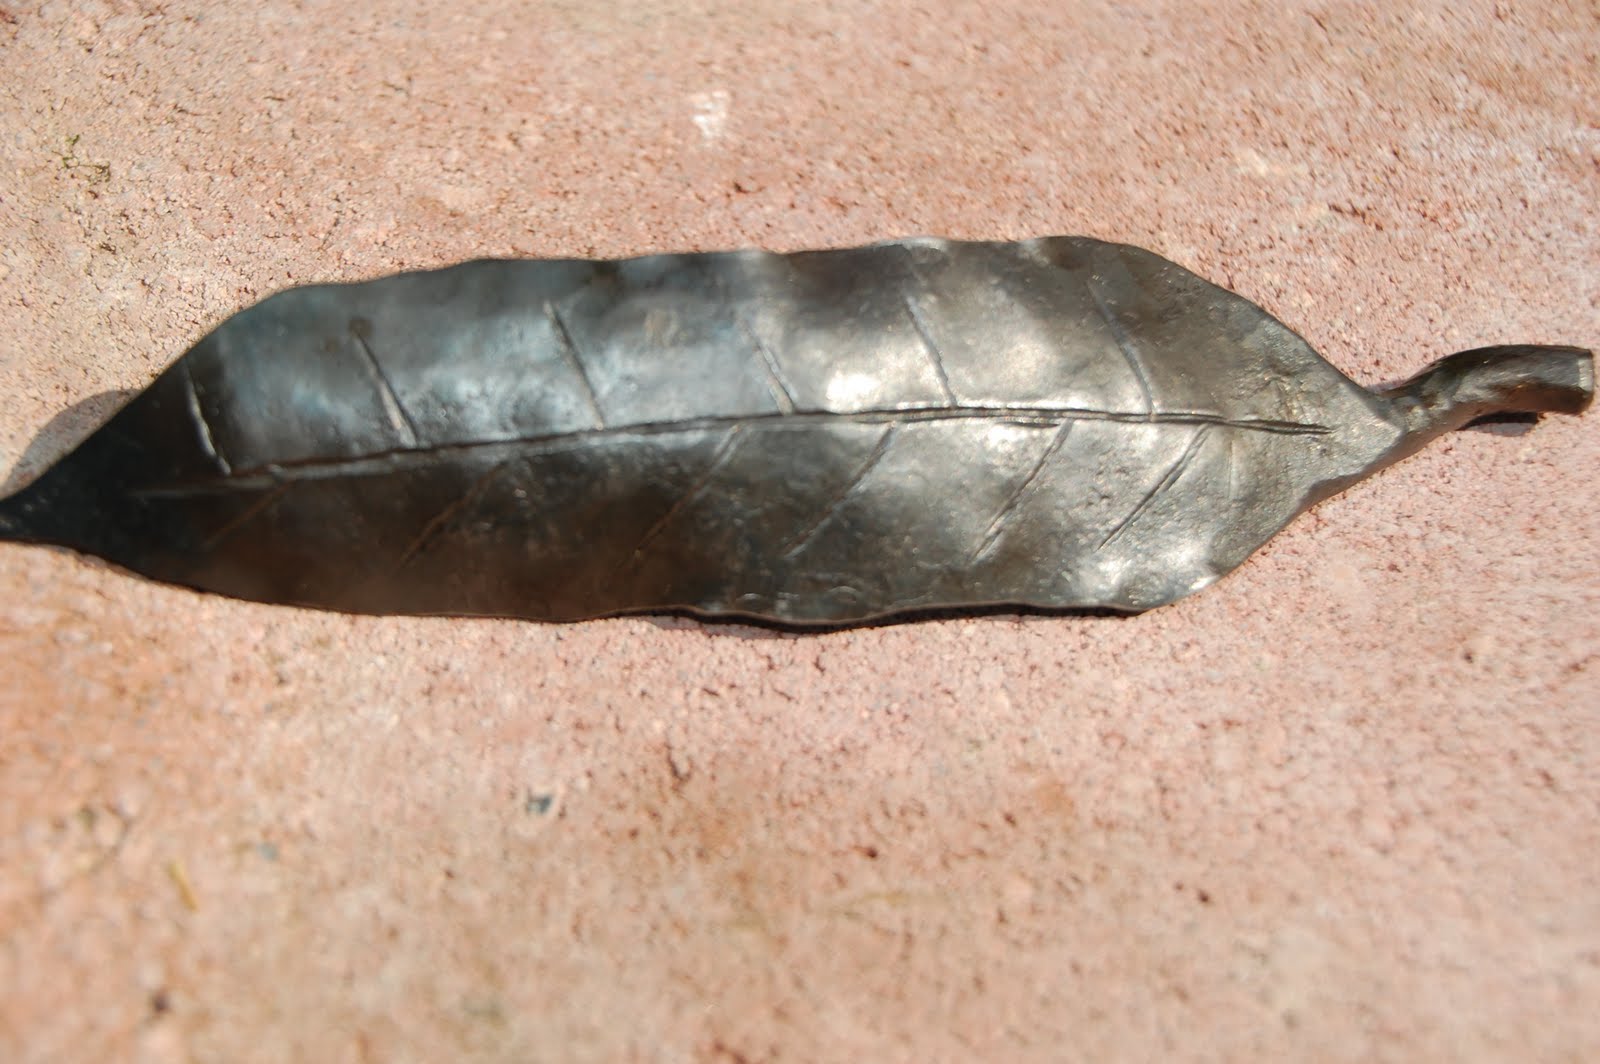
I made some leaves recently as one of my first commissions. I think these will make wonderful gifts and my wife and the buyer think they are beautiful, so I will keep making them. I hope to have some more available for the Market Fair in July.

Here is what they look like shaped, but not finished:

Here is the finished product:


Sunday, May 30, 2010

The Tradeoffs of Using Propane or Coal Forges

The main advantage I have found with using propane is that your pieces don't burn up.  If you leave a piece in a coal forge for too long there is a risk it will burn up (literally disintegrate and/or fall off), which stinks after you have time invested in a piece.  That said, fire management is good skill to know and it is fun to use coal if you are a fire bug like most of us blacksmiths are. 

In terms of overall productivity, however, propane is way better because it lights in an instant (no kindling, fussing, clinkers, etc) and your pieces can stay in the fire for long periods without burning up (essential if you are like me and get distracted all the time), so a larger percentage of the time you have available can be spent actually forging rather than futzing with the fire.  Its really a personal choice though and everyone is different.  Some guys will only use coal and the opposite is also true and everyone has their own set of reasons.

I would think in most cases, propane would work well for beginners because you have less to worry about.  Having to manage a fire AND worry about not buring yourself AND also trying to hit the piece while its hot AND trying to make contact in a place and that will actually move metal where you want it to is plenty to think about. 

You can always try a coal fire at any time, so there is no hurry to learn that, especially if you have access to a propane forge already.  Most guys start with coal because they don't have a propane forge yet and the cost to entry is less.  If you are in a neighborhood, though, propane is the only way to go because there is no smoke to disturb the neighbors.

Hope this helps.

Thursday, May 27, 2010

My Latest Sculpture: "Listen"


Do you think parenting has anything to do with my choice of subjects?

Friday, May 21, 2010

In action at the Market Fair!

This photo was taken by a new friend of ours, Donielle Rininger, and I like it very much.  I am completely amazed that she caught the hammer in motion like she did. 

At this point, I was at the very beginning of making a nail for a hook they were planning to hang in their home, which happens to be the exact same log cabin as we built.  Donielle's husband Michael also happens to be a respected bee expert, which is something we are considering trying, so this photo represents a lot of touch points for all of us. 

If you had told me several years ago that my chosen hobby would allow me to meet such interesting people, I never would have believed it, but it is true.  Pretty cool stuff!


Sunday, May 16, 2010

Colonial Farm Market Fair: Day 2

Another wonderful day -- many thanks to everyone who came out to see me!
Here, Kelly and I are working on a tenon (which connects into a mortis).  It was great to have two of us there because we were able to do things we might not otherwise have been able to do.  For example, here I am hammering and Kelly is holding the piece in tongs in one hand and the chisel in tongs in the other. 

Sometimes it seems like a blacksmith needs 3 hands!  :-)


Saturday, May 15, 2010

Colonial Farm Market Fair: Day 1

My very talented wife setup this table with my pieces for the Fair. 


I really enjoy explaining to the guests what I just made and how it all works.  The people were great and sometimes the conversation is more enjoyable that making the piece itself!


Sometimes the crowd was smaller than at other times:

I was really fortunate this time to have Kelly Smyth to work with this time.  Kelly has an amazing background and had been a professional smith for more than 30 years, so I learned some amazing things from her.  One of the best things was her patient lessons on the ins and outs of making mortis and tenon joins.  I really got an immersion in those this weekend and it was great to spend time with Kelly. 

I really look forward to working with her again in July at the next Market Fair!


I forgot my hardy cutoff on the first day, so this photo shows me using a handheld one, which is significantly harder than the hardy version!


Thursday, May 13, 2010

Blacksmithing with a buddy

Some recent photos of a buddy of mine and me in the forge:


Countdown to Claude Moore

I started cleaning up my pieces between conference calls and meetings to potentially sell this weekend.  And, I am going to start taking orders and selling pieces on the website in the near future.  How cool is that?


Monday, May 10, 2010

Closeups

Some closeups of my pieces that will go to Market Fair next week taken by an amazing photographer friend of ours:


Sunday, March 14, 2010

Aspery Prep!

I am really excited about my summer blacksmithing adventures!  I signed up for a class with my favorite master smith, Mark Aspery at Touchstone in June, so I am in the process now of making it through his first book. 

Having met Mark once at last year's BGOV Hammer-in, I know how serious a smith he is and so I want to be prepared to make the most of my week with him!  His book is called "Mastering the Fundamentals of Blacksmithing" (http://markaspery.net/www.markaspery.net/Book_1.html) and it is truly an incredible resource.


I have been going "back to basics" in this book and it has been very fun.  I actually understand the beginning chapters now since I have a little more experience and have been focusing on the tapers section first.  It is definitely an area that develops skill as you do it. 

I love one of the stories in the book, which talks about how Mark learned tapers when he was given his first job as a fledgling smith to make 1000 (yes, I did not mistype this) tapered points from 3/4" bar to use for mooring boats.  I have probably made less than 50 real tapers (well, probably more if you include hooks, but my point is still valid) in the entire two years I have been a blacksmith, so I can't imagine how much one can learn doing 1000 of them! 

Just scratching the surface here in terms of where I hope to go, but really enjoying it.  Thanks, Mark!!


Sunday, February 14, 2010

Progress!

I have been making scroll candlestick holders and backscratchers lately to prep for the May Market Fair.  My goal will be to learn a lot making the same thing over and over again and also to build up some inventory to sell at the Fair.  I plan to have a dozen of each by May.  I would also like to have 20-30 hooks done as well, but I haven't really started on those yet.

The last few weeks (through the holiday break) have been big for me in terms of progress.  On the backscratchers, I figured out how to make the twist on the handle finally.  I started out trying to twist the two ends around each other and then realized it was way easier to bend the piece and then grab the loop to make the twist.  That knowledge saved me huge amounts of time and I ended up being able to make one in 30 minutes this week, which pleased me.

I have learned a tremendous amount on the candlestick holders as well.  I learned the following things related to the pipe portion of the project:
  1. Don't cut the pipe with the hardy cut off - the pipe will get smashed and be unusable for the next time
  2. Cut the pipe with a hacksaw and begin the cut rightat the end of the fullered portion because otherwise you will end up with too much material for the rivet
  3. Stand on a piece of 4x4 or something else to make yourself taller when hammering the pipe in the fuller in the vise - I did this a few times standing on the ground and I ended up getting way too fatigued and the fuller job wasn't as nice because I was rushing to get the whacking over with
  4. Buy short pieces of pipe because it is hard to use them again after making a cup off one end (requires cleaning the end up with a hacksaw cut to start egain)
  5. 1-1/4" pipe is too big for most candles, so I have switched to 1" to give that a try
I learned a tremendous amount lately and will post more as time permits.

Saturday, January 9, 2010

Leaves!

Thursday, December 17, 2009


A Leaf


Jeff made a beautiful leaf while blacksmithing the other day. It was quite an accomplishment because leaves have been a challenge for him; give him something functional any day over an organic, decorative piece. But, he wanted to learn how to tap into that side of his craft, and he certainly succeeded!

Tuesday, January 5, 2010

January's Open Book

Undaunted Courage by Stephen Ambrose

Wednesday, December 30, 2009

December's Open Book

Blest Be The Tie by Alexander Lawrence (Larry's first in the Goins series)

Wednesday, December 9, 2009

Hot from the past -- Peter Ross Bio (published in December 2009)

Was sent a neat article today from a friend: http://www.newsobserver.com/life/home_garden/story/224230.html

Hot from the past
BY DIANE DANIEL - CORRESPONDENT
Send suggestions to diane@bydianedaniel.com

By his standards, the 1905 farmhouse Peter Ross shares with his wife, Louise Barnum, is not all that old. Ross, a nationally known blacksmith, has to explain to potential customers that when he says "historical restoration" work, he refers to buildings dating from 1650 to 1840.

After 25 years of heading up the blacksmith shop at Colonial Williamsburg in Virginia, Ross moved to Chatham County in 2006, after marrying Barnum, a longtime area real estate agent. (Ross moved from Forge Road in Virginia to White Smith Road here.)

Before renovating their home on 25 acres outside of Siler City, Ross first set up the studio where he makes custom hardware, tools and utensils for restoration projects. Current projects include supplying kitchen utensils and hardware for a privately owned 1750s kitchen in Virginia, making circa-1820s door hinges and locks for a museum in eastern Tennessee, and creating a lock to match an existing door at Thomas Jefferson's Monticello, which dates to the late 1700s.

"Up until now I've worked only in the historic house restoration field, but this year I'm trying something new - a line of historically inspired but contemporary iron pieces that people can use in their homes," said Ross, 55. "Those could be kitchen utensils, tools for wood stoves and fireplaces, and brackets for lights."

Ross decided to add another line of work, although he typically has a backlog of restoration jobs, because he wanted to reach out locally; most of his clients are in other states.  "I wanted a way of being connected to the community, to develop relationships with other artists and the public," Ross said.  To that end, he signed up to be a stop on the Chatham Studio Tour, where artists open their workspaces to the public. The tour is this weekend and next.  Ross will give demonstrations with his forge, anvil, hammer and tongs, something he's used to after speaking with the hundreds of thousands of Williamsburg tourists over the years.


First a hobby

Ross' association with museums began when he was 17, living on Long Island, N.Y. He and his father took a blacksmith class at a carriage museum in Stony Brook.  "They had a blacksmith shop, and would teach classes in the community," Ross said. "They taught us to make simple hooks, and I just loved it. Of course neither one of us thought it would lead to a blacksmithing career."

Ross then became perhaps the only teenager on the East Coast to set up a blacksmith shop in the corner of his garage.  "I played around with it as a hobby for a while, and then I volunteered at another museum on Long Island, a reconstructed town called The Old Bethpage Village Restoration. That was enough to convince me to find a college that had some kind of craft program."

Ross ended up at the Rhode Island School of Design, where he met his mentor, Dick Everett of Connecticut, who specializes in restoring 17th- and 18th-century hardware and furnishings.  "He was in an old town, surrounded by old houses," Ross said. "I worked for him with the idea that I'd eventually open my own business."

And he did, in 1976 on Deer Isle, Maine, also home to Haystack Mountain School of Crafts. "It's just a beautiful, breathtaking spot, right on the ocean," he said. But the Williamsburg job beckoned three years later. 

Past methods

"It's a fascinating environment," he said of the country's most famous living history museum. "It's a great academic institution. You're surrounded with other professionals studying restoration - curators, architects, archaeologists. But you're also dealing with tourists who often have no or little knowledge, and so your job is to educate them. It's an interesting combination."

At one point, Ross as master blacksmith had a staff of seven blacksmiths.  "We had the same staff of blacksmiths for 12 years," he said. "It was a very skilled group."  About half his time was spent with the public and the other half working on restoration projects at the museum.  "I was hired to turn the blacksmithing into a more academic program instead of a souvenir-oriented program, so it was an exciting time to be there," Ross said. "There was a tremendous shift in many of the crafts there to do more research, to study long-developed techniques and to understand decorative arts from the maker's viewpoint. We got to look at everything with a fresh eye."

One of the things Ross learned and often lectured about was the difference between contemporary and pre-industrial aesthetics.  "Our job was to re-create old pieces, and the methods in which they'd been made. It was a revelation to me that when you don't have modern tools at your disposal, not only are the tools you're using different, but the whole thought process is markedly different. You don't use the same sequence of steps. It's like cooking without a recipe, when you go by taste and sense and feel."

Nature's model

The 18th-century worker, he said, was led by nature's infinite variety.  "The aesthetic ideal was nature. Like if you have two maple leaves. They have the same character, but are different in size and shape. That was the function of handwork through the ages until industrialization. Now it's all about uniformity and measured precision, sometimes even in ways that can be detrimental to the work."

Ross' more contemporary forged metal work won't be a huge stretch from his restoration work because he's basing the designs on historical pieces.  "I'm not sure how much of the new stuff I'll do, but it's something I wanted to try. We'll see how it goes."  No, he answered, he doesn't have a Web site showing his contemporary work. He is, after all, a little stuck in the 18th century.


Friday, November 27, 2009

November's Open Books

Pillars of the Earth - Ken Follet (great!)

Wax Finish

I did my first batch of wax finish today and it came out great!  I was nervous at first, as was my wife, considering all these heavy wax and turpentine fumes were consuming the front part of the house, but she was gracious and even let me use her glass measuring bowl and some other essentials!


Despite my initial worries centering around burning down the house and spontaneous combustion, it all turned out all right!  I used Doug Merkel's recipe below from the ABANA website faithfully, except for I skipped the Japan Dryer since I did not have any.  Many thanks Doug!


Doug's recipe (which first appeared in the March 1996 Appalachian Area Blacksmith Assn. Newsletter) is as follows:

Wax for All Seasons, by Doug Merkel

A significant portion of my work deals with the repairs and reproduction of antique ironwork. Most of my customers want a natural finish that looks old, protects the metal and which can be touched up if needed without lots of work or fancy chemicals. To meet their needs I have modified a few formulas that have been around for sometime into one that works for me and my customers. For some of the larger jobs, I leave a small container of the wax for use by the customer. It wears well inside and does quite well outside, if applied correctly. I have a piece of ironwork with this finish that has been out in the elements for over a year without rusting.

1 cup Johnson's Paste Wax
1 cup Boiled Linseed Oil
1 cup Turpentine
1/2 cup Shaved/pieces of Beeswax
2 tbsp. Japan Dryer

The first three ingredients can be obtained at most any hardware store, such as Lowe's, Home Depot, etc. The Japan Dryer is used by artists to speed the drying time for their oil paints, so is available at many art supply stores. The beeswax can be obtained from a local beekeeper, beekeeper supply shops, or blacksmith supply companies.

Mixing The Ingredients
Put all the ingredients into a glass quart jar, put the lid on with the retaining ring very loose. A metal can may be used, but it needs a tightly fitting cover. Either set up a double boiler or set next to your forge to get the mixture to melt. Do not put directly on the heat source and watch out for open flames. Once the ingredients are melted, tighten the lid ring and shake like crazy until all the wax is dissolved and is a homogenous mix. As it cools, it will become a soft paste. Keep the lid on when not in use.

Metal Preparation
Remove all scale with a power wire brush or by hand. if you want a dark finish, remove the scale at a dull red and let the metal air cool until you can just handle it with your bare hands. For a brighter finish, use a power wire brush and remove all the scale while the metal is cold, then apply enough heat until you can just hold it in your hand.

Application
Apply the mixture with a brush, your fingers, or with a small rag. The heat will melt the mix and it will run into every nook and cranny. Let it cool and buff out with a rag. If you let the excess mix stay on the iron, it will eventually harden, but every place that has excess will show up as a bright spot. A second coat can be added to heighten the luster while the metal is cold Just remember to buff off the excess with a cloth.

Saturday, November 14, 2009

Claude Moore Colonial Farm 2010 Market Fair Dates

Please join me and my family at the next Claude Moore Colonial Farm Market Fair!  It will be great to see you all there the 3rd full weekend of May and July.

The actual dates are:
    May 15 and 16, 2010
    July 17 and 18, 2010

You can see additional details at www.1771.org.

Tuesday, October 27, 2009

October's Open Books

The Backyard Blacksmith (Jeff) - Lorelei Sims (perpetually open!) The Blacksmith's Craft (Jeff) - Charles McRaven A Short History of the World (Jeff) - J.M. Roberts

Sunday, October 18, 2009

My First Demonstration as a Colonial Blacksmith

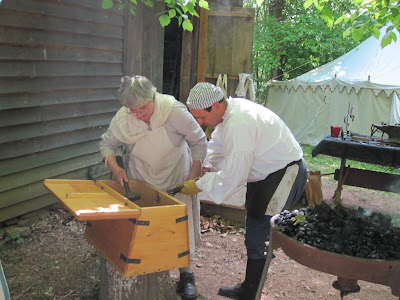
After being cancelled on Saturday due to rain, the Market Fair at Claude Moore Farm in McLean, Virginia opened on Sunday, giving me the chance to have my first blacksmithing demonstration as a living history reenactor. Since the year was supposed to be 1771, I got to blacksmith in appropriate attire (except for the boots that the mud made necessary).


I had a great time, and really appreciate all your encouragement. And, please save the date -- I'll be doing this again the 3rd weekend in May. It should be warmer, at least!


Thursday, October 8, 2009

Vulcan Anvil

The anvil I will most likely use (unless Erin can convince me to use his because it rings more :-) ) at the Claude Moore Market Fair this October is one we dug out of the pig barn there (literally) and spiffed it up with an angle grinder and some mineral oil and it looks great.  You can see some shots of it and its little brother (also found buried and unloved on the farm) on my Market Fair post here, but I thought some of you might be interested in the history of these anvils.


I found this information posted on some public blacksmithing sites posted by some real pros and I have tried to faithfully represent their words, but please forgive me if I miscredit or misquote someone - that mistake would surely be mine and hopefully will not reflect negatively on the fine individuals I got the data from!


I found these comments on Vulcan today, which I thought some of you might find interesting:


"Production of one-piece steel anvils was pretty well limited to imports from Sweden, with Kolhswa, SISCO and Soderfors (Paragon) being the leading brands.  One American manufacturer was Columbian (indented triangle with a C logo)."


"Likely the majority of the anvils manufactured in the U.S. were constructed of a cast iron body and steel plate.  These were sometimes called 'dead' or 'city' anvils as they did not have the distinctive 'ring' of a composite bodied anvil.  Fisher & Norris and Vulcan pretty well dominated this market.  Fisher & Norris anvils were targeted to the blacksmithing market and they may have produced more anvils than U.S. composite-bodied anvils combined.  They were the first and last major U.S. anvil manufacturer being in business from about 1854 to 1970.  Vulcan anvils were often carried as the low-end anvil in national mail order catalogs and were predominately intended for places such as schools, garages and farms.  While Fisher & Norris (only FISHER is on the anvil, usually on the front foot) were of the London-pattern, Vulcans tended to be blocky.  Fisher & Norris' logo was an eagle holding an anchor while Vulcan's was a circle or oval with an arm holding a hammer)."


"Cast iron bodied, steel plate top anvils are popular for use in residential neighborhoods due to their lack of a ring.  (And a propane forge and non-ringing anvil will go a long way towards being a good neighbor.)"


"I wouldn't go over about $1.00 pound for a VULCAN. They were apparently never marketed for the blacksmithing trade, but rather to institutions, garages, farms, schools and such. Normally they were carried as the 'low end' anvils in national hardware catalogs. They tend to be short, fat and ugly versus the typical Fisher & Norris, with their much more classic London pattern look."


"Vulcan anvils are a huge step up from a Harbor Freight cast iron ASO (Anvil Shaped Object - for looks only).  They are made with a steel face and horn plate with cast iron body. As such they are a quiet anvil and so good to use when you have close neighbors.  However, the face is generally softer than many traditionaly made anvils and may also be thinner. They are also harder to repair."

Sunday, October 4, 2009

Jeff's Blacksmithing Debut -- Please Come!


So, my wife says I'm "a bit nervous" , but talking about blacksmithing is going to be loads of fun for me! Plus, I get to demonstrate it!  Here's the details for those of you who live nearby:

Colonial Market Fair -- October 17th and 18th

Notice is herewith given that a Market and Fair shall be held on the third full weekend of the months May, July, October of this year instant, at the grounds so set aside and designated near the Claude Moore Colonial Farm at Turkey Run below the Little Falls of the Potowmack on the Georgetown Pike in McLean Virginia.

The Claude Moore Colonial Farm
6310 Georgetown Pike • McLean, VA 22101 -- 703-442-7557
October 17th and 18th
Saturday and Sunday 11am-4:30pm
$5 for adults; $2.50 for children (3-12 years old) and senior citizens but please note the discounted 50% off coupon for admission.

If you are available, please show up -- I'd love the support. Just don't make too much fun of my fancy colonial attire!

Friday, October 2, 2009

Anvil Hardness Testing

I found some interesting information online today about hardness testing.  I am posting this here for my own purposes, so please don't question me on the authenticity or veracity of these claims.  I have not verified the content.

Testing an anvil top for hardness - two popular methods:

1 - Drop a 1" steel ball from 10" and record rebound on several areas of the top - Measured from the bottom of the ball to the bottom of the ball at the peak of the first bounce at  center of anvil over waist
    --- Anything below 40% is generally junk and some ASO's test as low as 10%
    --- 50%  (5")  is OK but a relatively soft anvil
    --- 70%  (7")  is an average good anvil
    --- 80%  (8")  and up are top quality anvils.

2 - Hit the top plate moderately hard with the ball end of a heavy ballpeen hammer.  Dimpling indicates a top too soft to stand up to significant usage.

Saturday, September 19, 2009

Dressing an Anvil

Some interesting stuff I found today online about dressing an anvil.  I have not tried this yet, but will soon.  I have not verified this content, but I have posted it here for my own use.  Feel free to use it as you see fit, but not warranty is implied or stated, so caveat emptor!  :-)


The comments I found online are:
Ken Scharabok (responding to a post by Patdf)
Posted on Thursday, February 03, 2005 - 8:01 am: Without knowing what your new anvil is (and whether it is brand new or just new to you), it is difficult to answer your question. Will assume brand new. If it is one of the Asian or Russian imports you can expect to dress up much more than the corners. While the top may be milled relatively flat, the horns usually still have the mold seams on them. If you do any work to the sides, don't be surprised to find body putty. (And, believe me, these anvils are much like a blind date. Don't expect it to look like the pictures.) If it is one of the American cast steel (e.g., farrier anvils) or European imports, then ask the seller for their recommendations. My recommendation would be to just knock off the edges if very sharp slightly. After you have used it for a while you can determine where and how much you might want to change the radii.
Patdf
Posted on Thursday, February 03, 2005 - 6:14 pm:
Ken and Dave, thanks for the reply, I neglected to state that it is a brand new anvil. It's a 175# Euroanvil, it has a round beak and a square beak on the opposite end with a shelve. I looked for used anvils for a while but couldn't find anything to speak of. And the prices are crazy for used for I think most are being picked up by collectors. I just wanted to work with it not look at it. I spoke with my dealer as suggested by Ken, and he stated to make about a 1/8 radius on the edges. This would be about the recommendation that Ken mentioned. Dave you mentioned to keep one edge square, I can see where that would help and be functional. But would I risk breaking an edge since I'm a begginner with not enough practice on hammer control. In my mind I'm thinking that if I put a slight radius all sides I don't risk a chipped anvil. Please advise. Thanks again. Regards, Pat
Ed Thomas (Ejthomas)
Posted on Thursday, February 03, 2005 - 6:49 pm:
Patdf, The edges of the Euroanvil aren't particularly hard. The typical argument for grinding a small radius to protect the edge doesn't really apply to that anvil. Take a file and carefully check the edge and you will see what I mean. The edge won't chip off the same way a brittle face of an old anvil will. So you can safely leave the edge wherever you want it. Even on the "sharp" edges of my anvil, I tend to ease the edge just a little bit, but don't be in a hurry. You can always take more off, but it's darn hard to put it back on. Congratulations on your new anvil! I think you will like that one. May you have many hours of forging fun with it.


Rich Waugh (in another thread)
Friday, September 28, 2007 - 10:11pm
Jake, Congratulations on the new anvil. It should serve you well, particularly if you get it dressed to suit your needs.
I can tell you how I dress my anvils, and why, and you can determine what of that applies to you.
I radius the edges of my anvil's faces to prevent chipping and to prevent creating sharp inside corners in my work, which could create cold shuts that later become cracks. I use a fairly large radius on the far side, near the horn. The first four or five inches back from the front are radiused at about 3/16" radius, or 3/8" diameter - around the radius of a fountain pen. The radius then gets tighter as it progresses to the heel of the anvil. The front edge is treated much the same, but the radius is a bit smaller; perhaps 1/8" radius tapering to 1/16" at the heel.
The horns on all my anvils are close to a mirror polish, as are the faces. This is not absolutely necessary for most work, but I do some forging of bronze and brass, and occasionally silver, and I want to have as little clean-up work to do as possible after forging. Also, a smooth surface rusts slower than a rough surface. That matters where I live.
I don't get too excited about chamfering my hardy hole or pritchel holes, as I absolutely NEVER, ever, use a hardy shank that is a tight fit in the hole. For years I used anvils that were very old, with wrought iron bodies and steel faces or cast iron bodies and steel faces, and a tight tool in the hardy hole could, if beat heavily, wedged itself hard enough to crack a face plate. With my Nimba, or your cast steel anvil, that is no real worry, but I still stick with free-fitting hardy tools. A very light chamfer is good to keep from marking tool shanks, but that's all you need. Do the same for the pritchel hole(s).
I recommend a belt sander and an angle grinder with a 180 grit flap disc for cleaning up anvil faces and horns. Don't use a hard grinding wheel, as you'll inevitably put gouges in that new anvil and annoy yourself.
If you have other questions, feel free to ask. I'll try to help.